
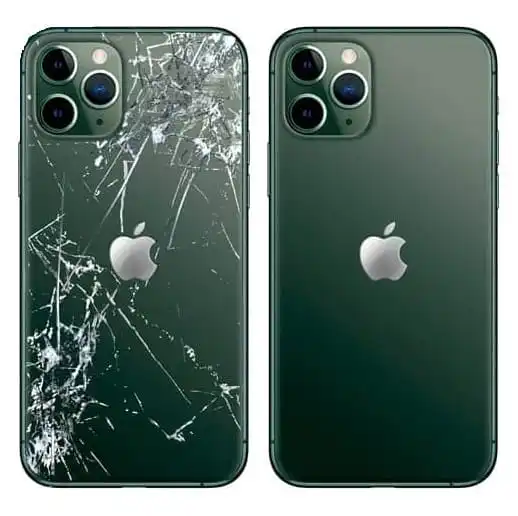
Replacing a mobile back panel is a task that ranges from easy (for phones with snap-on plastic backs, often older models) to advanced and risky (for modern phones with glued-down glass or ceramic panels).
Because modern phones (like most flagship models from the last few years) use adhesive to seal the back panel for water resistance, this process requires specialized tools and patience.
🛑 Safety Warning: Attempting to replace a back panel, especially a glass one, without the proper tools (heat gun, suction cup, specialized prying tools) and experience can easily lead to damage to internal components, the battery, or the camera module. Proceed at your own risk.
Here is a general guide outlining the required tools and the steps for replacing a glued-down glass back panel (the most common modern design).
1. Required Tools
You will need a specialized kit for most modern phones:
| Tool | Purpose |
| Heat Gun / Hair Dryer | To soften the strong adhesive holding the panel in place. |
| Suction Cup | To create a gap between the panel and the frame. |
| Thin Plastic Opening Tools (Spudgers) | To slide under the glass and cut the adhesive without scratching the internals. |
| New Adhesive Strips | To re-seal the new back panel and maintain water resistance (crucial). |
| Protective Gloves/Safety Glasses | To protect against broken glass shards. |
| Rubbing Alcohol (90%+) | To clean off old adhesive residue. |
2. Step-by-Step Replacement Guide
Step 1: Power Down and Prepare
- Power Off: Absolutely ensure the phone is completely powered off.
- Remove SIM Tray: Remove the SIM card tray to prevent damage to it during prying.
- Secure the Screen: If the screen is already cracked, cover the entire front and back with clear packing tape. This prevents tiny glass shards from flying and keeps the glass fragments together.
Step 2: Apply Heat to Soften Adhesive
The back panel is sealed with strong, waterproof adhesive.
- Heat Application: Use the heat gun (or hair dryer) to heat the perimeter of the back panel, focusing on the edges.
- Temperature: Heat the edges for 30 seconds to 1 minute at a time. The temperature should be warm enough to be uncomfortable to the touch, but not so hot that it damages the paint or melts plastic.
- Softening: Heating softens the glue, making it pliable.
Step 3: Prying Open the Panel
This is the most critical step.
- Create a Gap: Apply the suction cup near the bottom edge and pull up gently to create a tiny gap between the glass and the frame.
- Insert Tool: Immediately insert a thin plastic opening tool (or guitar pick) into the gap. Do not use metal.
- Cutting the Adhesive: Slide the tool around the perimeter of the phone to slowly cut through the adhesive. Caution: Be aware of the location of the fingerprint sensor cables, battery, and wireless charging coil (often located in the center). Avoid inserting the tool too deeply (usually more than 2-3mm).
- Reheat: If the tool gets stuck, reheat that section of the phone before continuing.
Step 4: Disconnect Components (If Applicable)
On many models, the back panel is connected to the motherboard via a thin ribbon cable (for the fingerprint sensor, NFC, or wireless charging coil).
- Partial Lift: Once the panel is mostly detached, lift it gently like a book cover, pivoting from the side where the cable is attached.
- Disconnect: Using a plastic spudger, carefully disconnect the ribbon cable connector from the motherboard.
- Remove Old Panel: Remove the old, damaged back panel completely.
Step 5: Clean and Apply New Adhesive
- Remove Residue: Use rubbing alcohol and a microfiber cloth to thoroughly clean the entire frame of the phone, removing all traces of the old adhesive and any glass shards. Failure to clean the frame will prevent the new panel from sealing correctly.
- Apply New Seal: Apply new, precisely cut adhesive strips to the frame of the phone, ensuring the strips do not cover any internal sensors or microphone holes.
Step 6: Install the New Panel
- Connect Cable (If Applicable): If your new panel has the component cable, carefully reconnect it to the motherboard.
- Align and Press: Align the new back panel perfectly onto the phone frame. Press firmly and evenly around the entire perimeter for several minutes to ensure the new adhesive bonds securely.
- Cure Time: Place the phone under moderate pressure (e.g., clamp it gently or place heavy books on it) for 3 to 4 hours to allow the adhesive to fully cure and seal the panel, restoring water resistance.
After the curing time, reinsert the SIM tray and power on the device.
O my friend — but it is too much for my strength — I sink under the weight of the splendour of these visions! A wonderful serenity has taken possession of my entire soul, like these sweet mornings of spring which I enjoy with my whole heart. I am alone, and feel the charm of existence in this spot, which was created for the bliss of souls like mine.
I am so happy, my dear friend, so absorbed in the exquisite sense of mere tranquil existence, that I neglect my talents. I should be incapable of drawing a single stroke at the present moment; and yet I feel that I never was a greater artist than now.